> ## Documentation Index
> Fetch the complete documentation index at: https://sequence-0fb8d9e6-6256-forte-config.mintlify.site/llms.txt
> Use this file to discover all available pages before exploring further.
# Embedded WalletのGoogle設定
> Embedded Walletインスタンス用のGoogle OAuthクライアントの設定方法をご案内します。ウェブ、Android、iOSアプリケーション向けにOAuthクライアントIDを作成する手順に従ってください。
Google認証をEmbedded Walletインスタンスに統合するには、Google Developer ConsoleでGoogle OAuthクライアントを設定する必要があります。Embedded Walletをネイティブモバイル、デスクトップ、またはウェブアプリケーションのいずれに統合するかによって、適切な設定を選択してください。
## OAuthクライアントIDの作成
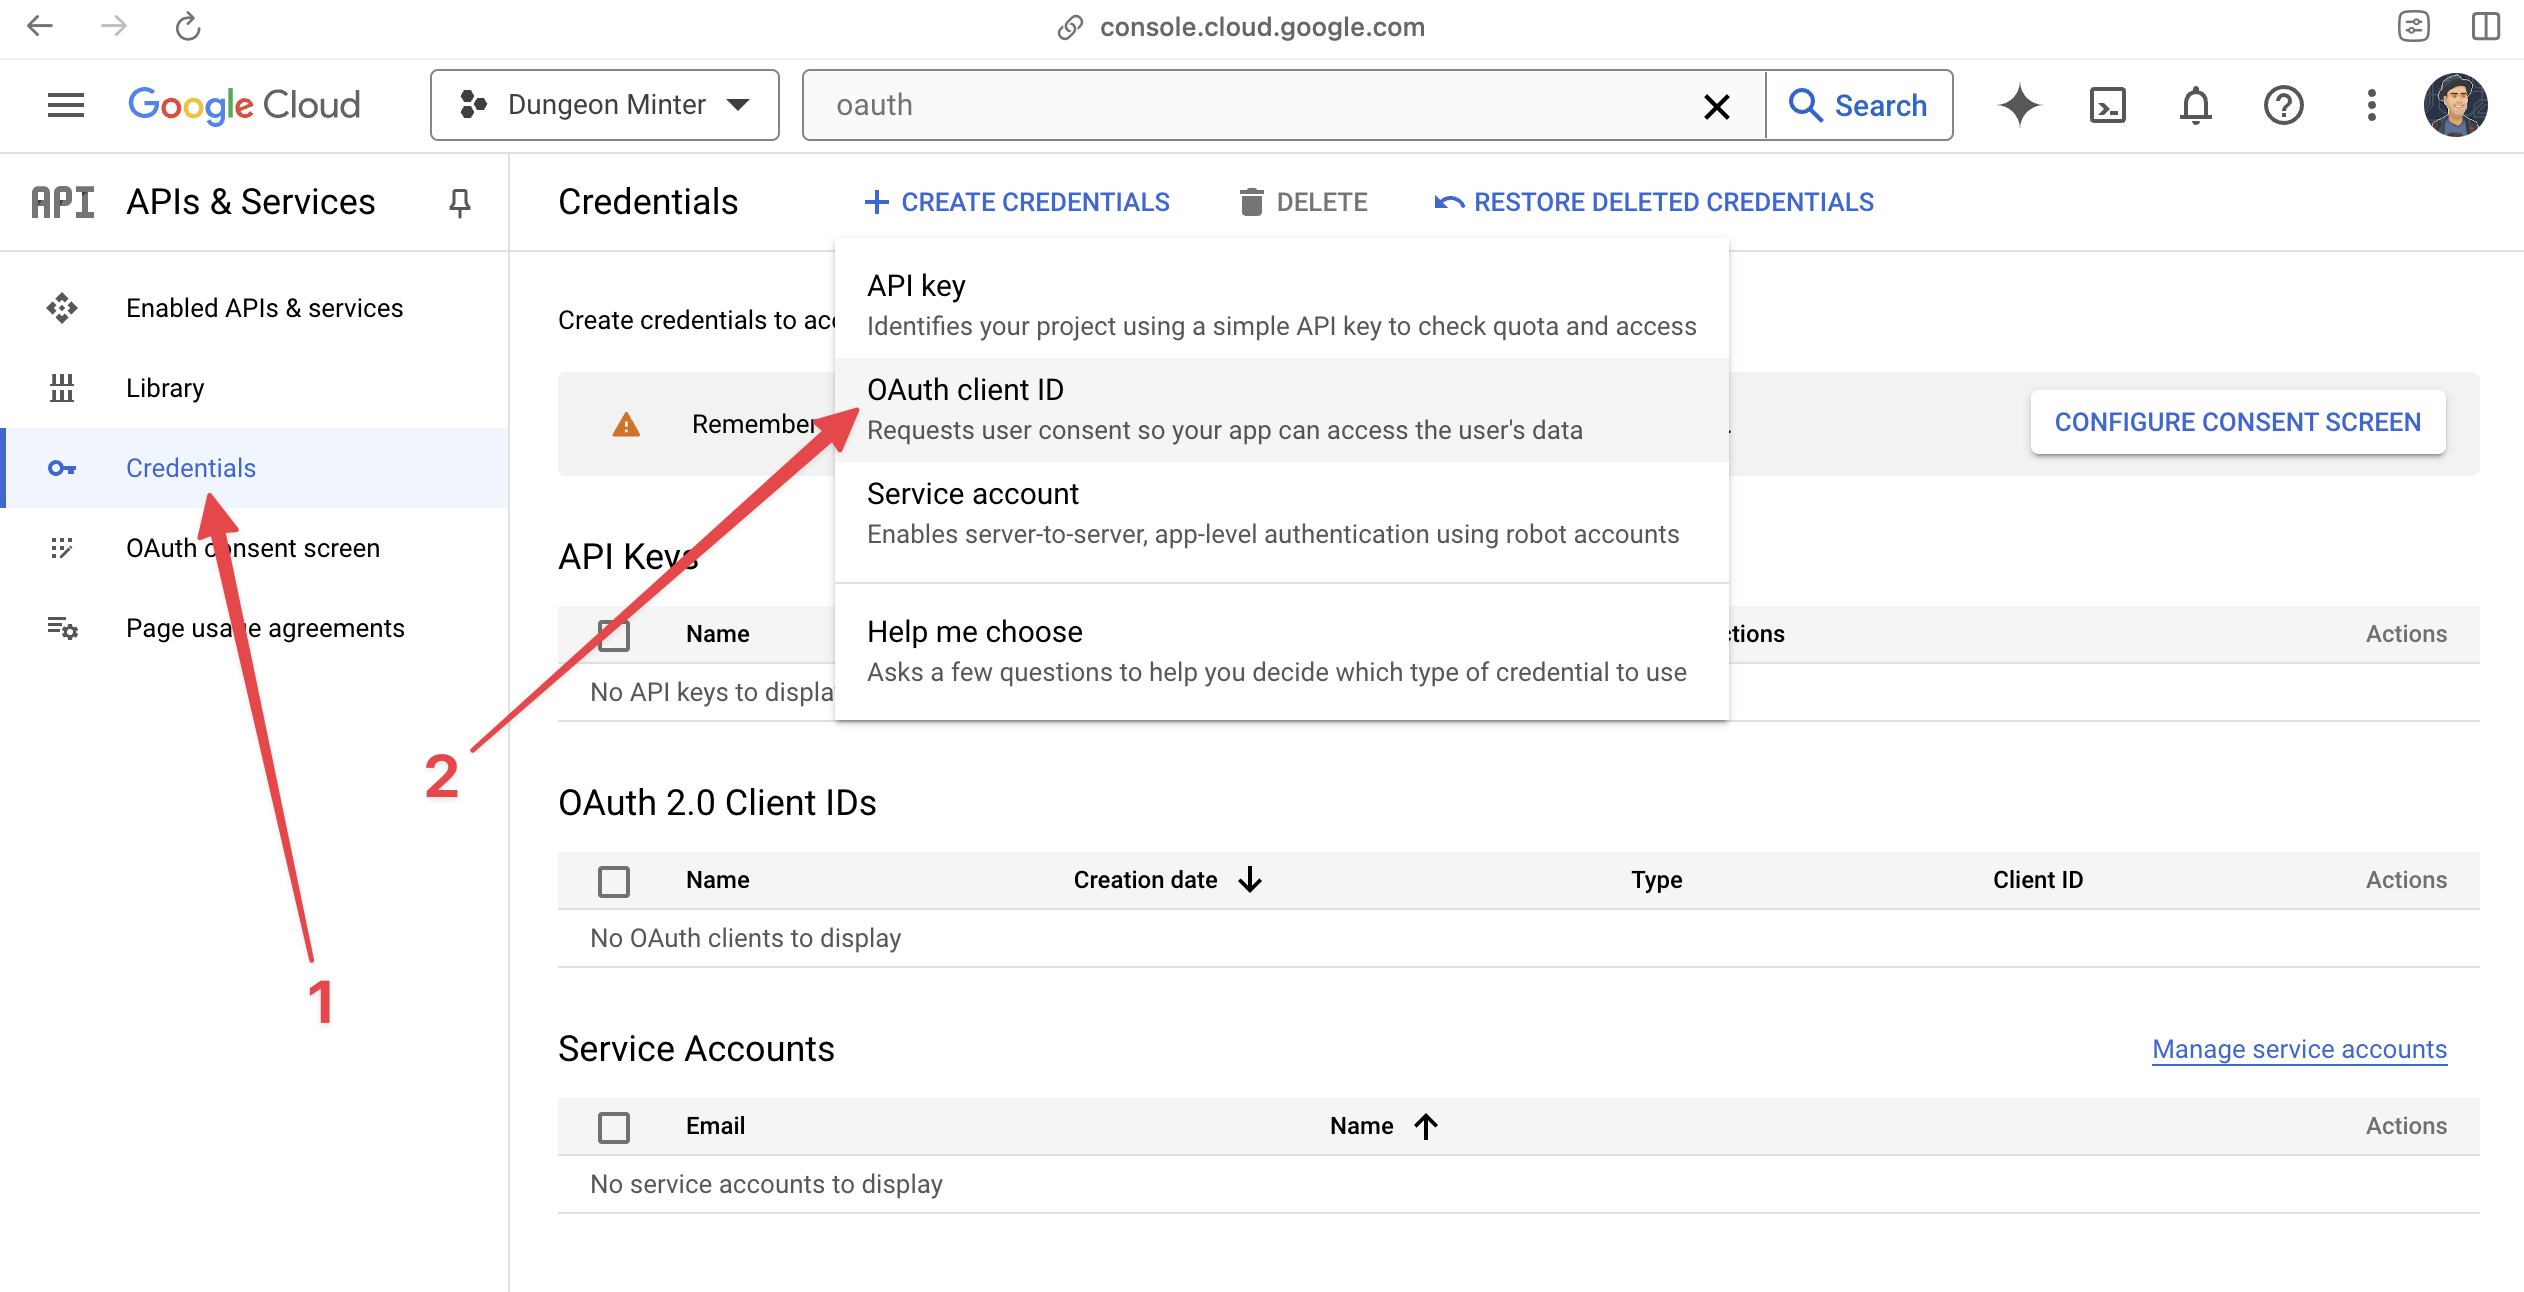
まず、[Google Developer Console](https://console.cloud.google.com/)にアクセスし、「APIとサービス」>「認証情報」へ進みます。「認証情報を作成」>「OAuthクライアントID」を選択してください。まだの場合は、OAuth同意画面の設定も必要になる場合があります。
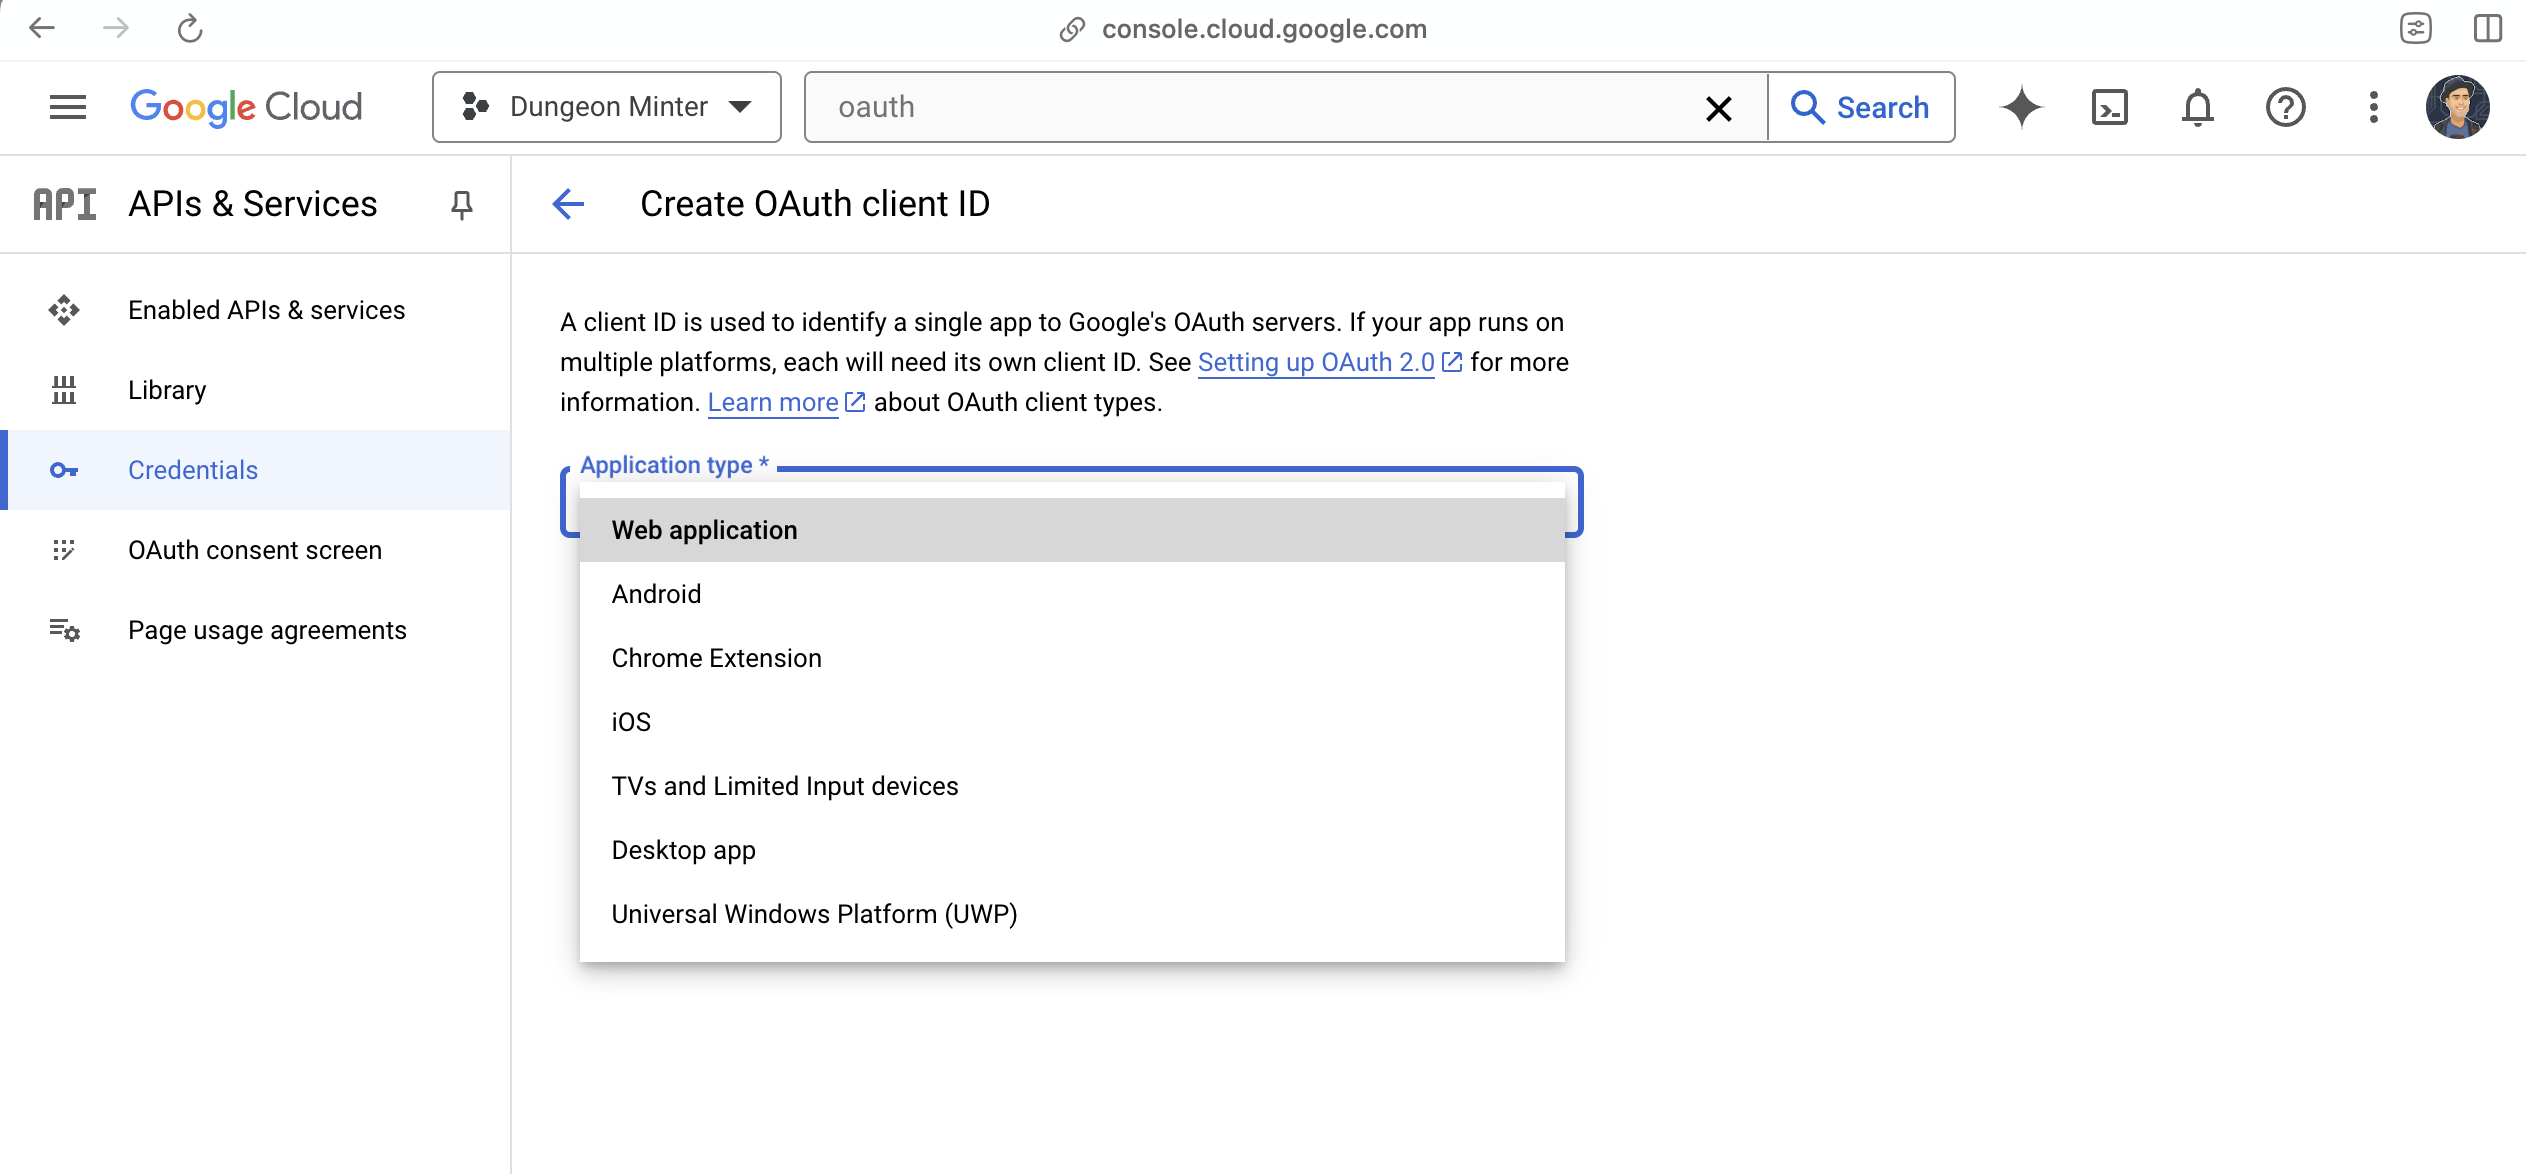
 アプリケーションの種類に応じて、「ウェブアプリケーション」「iOS」「Android」から選択してください。
 以降の手順は、設定するアプリケーションタイプによって異なります。
## ウェブアプリケーションの設定
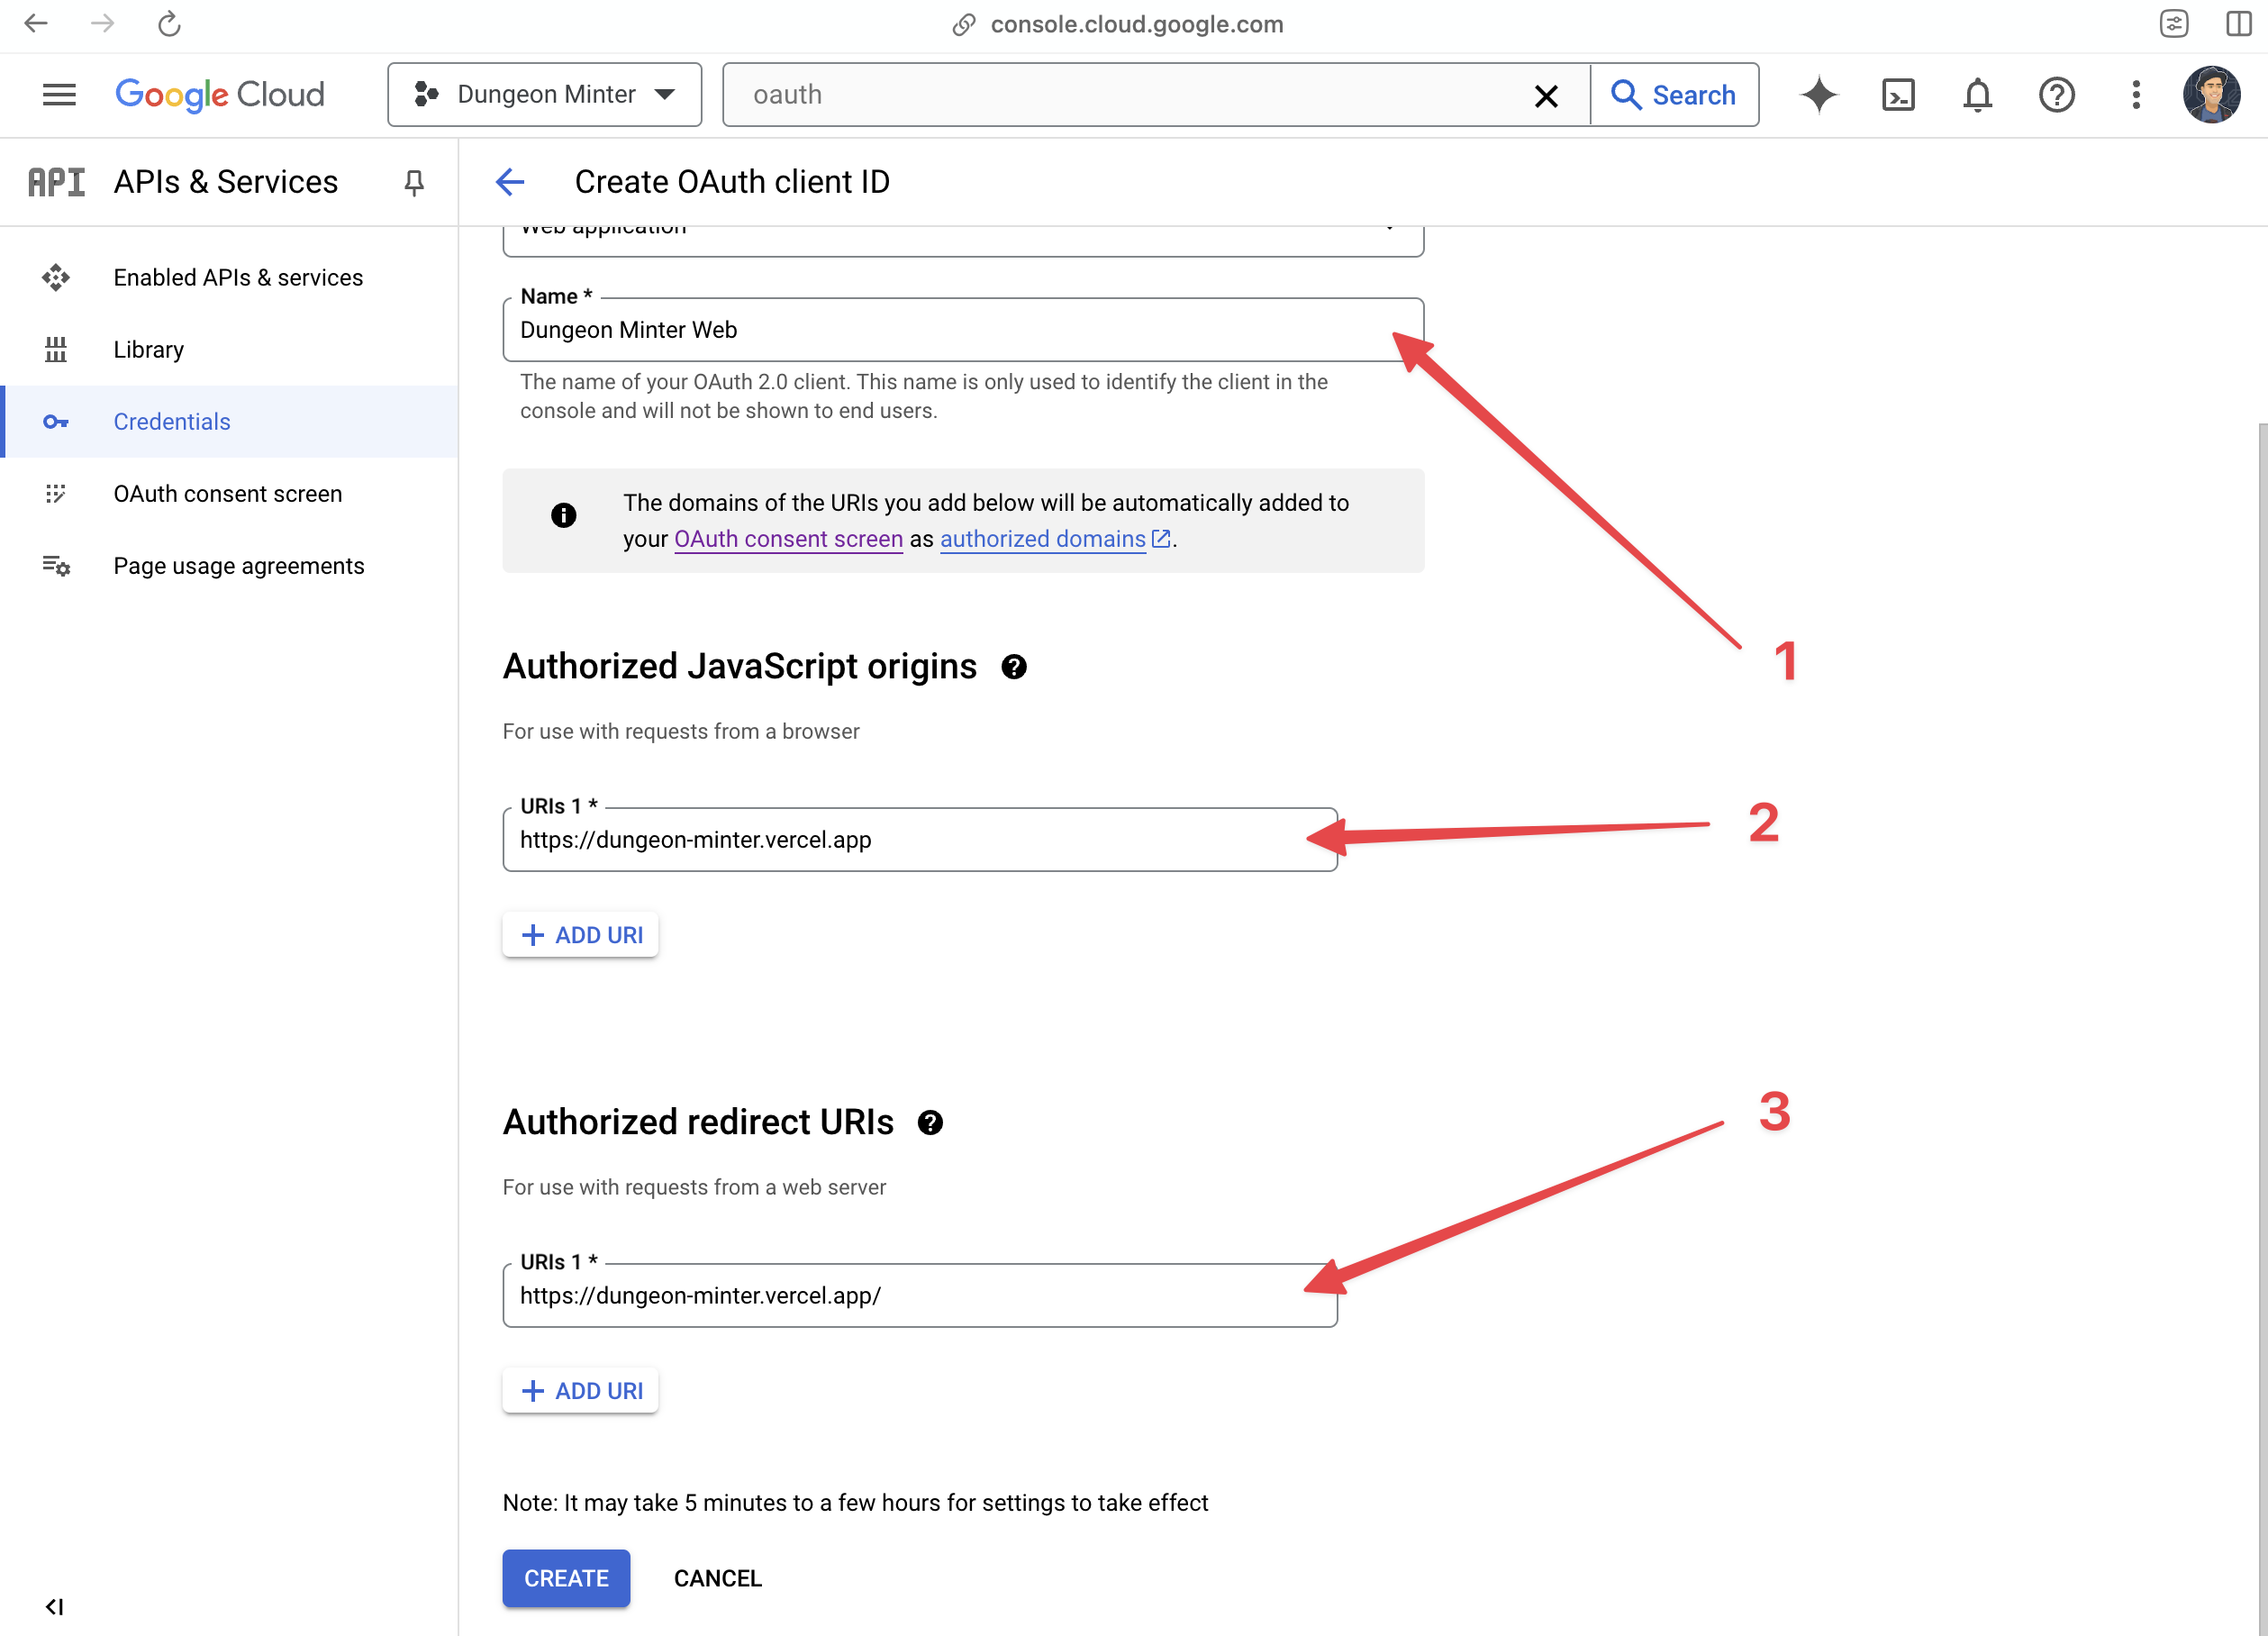
ウェブアプリケーション用のクライアントIDを設定する場合、以下の情報が必要です:
1. アプリケーション名
2. 承認済みJavaScriptオリジン:このクライアントIDと連携を許可するドメインのリスト
3. 承認済みリダイレクトURI:認証成功時にユーザーがリダイレクトされるURIのリストです。Sequence SDKでは、デフォルトでSDKを読み込んだ同じページにリダイレクトされます。
以降の手順は、設定するアプリケーションタイプによって異なります。
## ウェブアプリケーションの設定
ウェブアプリケーション用のクライアントIDを設定する場合、以下の情報が必要です:
1. アプリケーション名
2. 承認済みJavaScriptオリジン:このクライアントIDと連携を許可するドメインのリスト
3. 承認済みリダイレクトURI:認証成功時にユーザーがリダイレクトされるURIのリストです。Sequence SDKでは、デフォルトでSDKを読み込んだ同じページにリダイレクトされます。
 ポート付きのlocalhostアドレス(例:`localhost:4444`)を承認済みオリジンに追加する場合、テスト時に動作させるためにはポートなしの`localhost`も追加する必要があります。
## Androidアプリケーションの設定
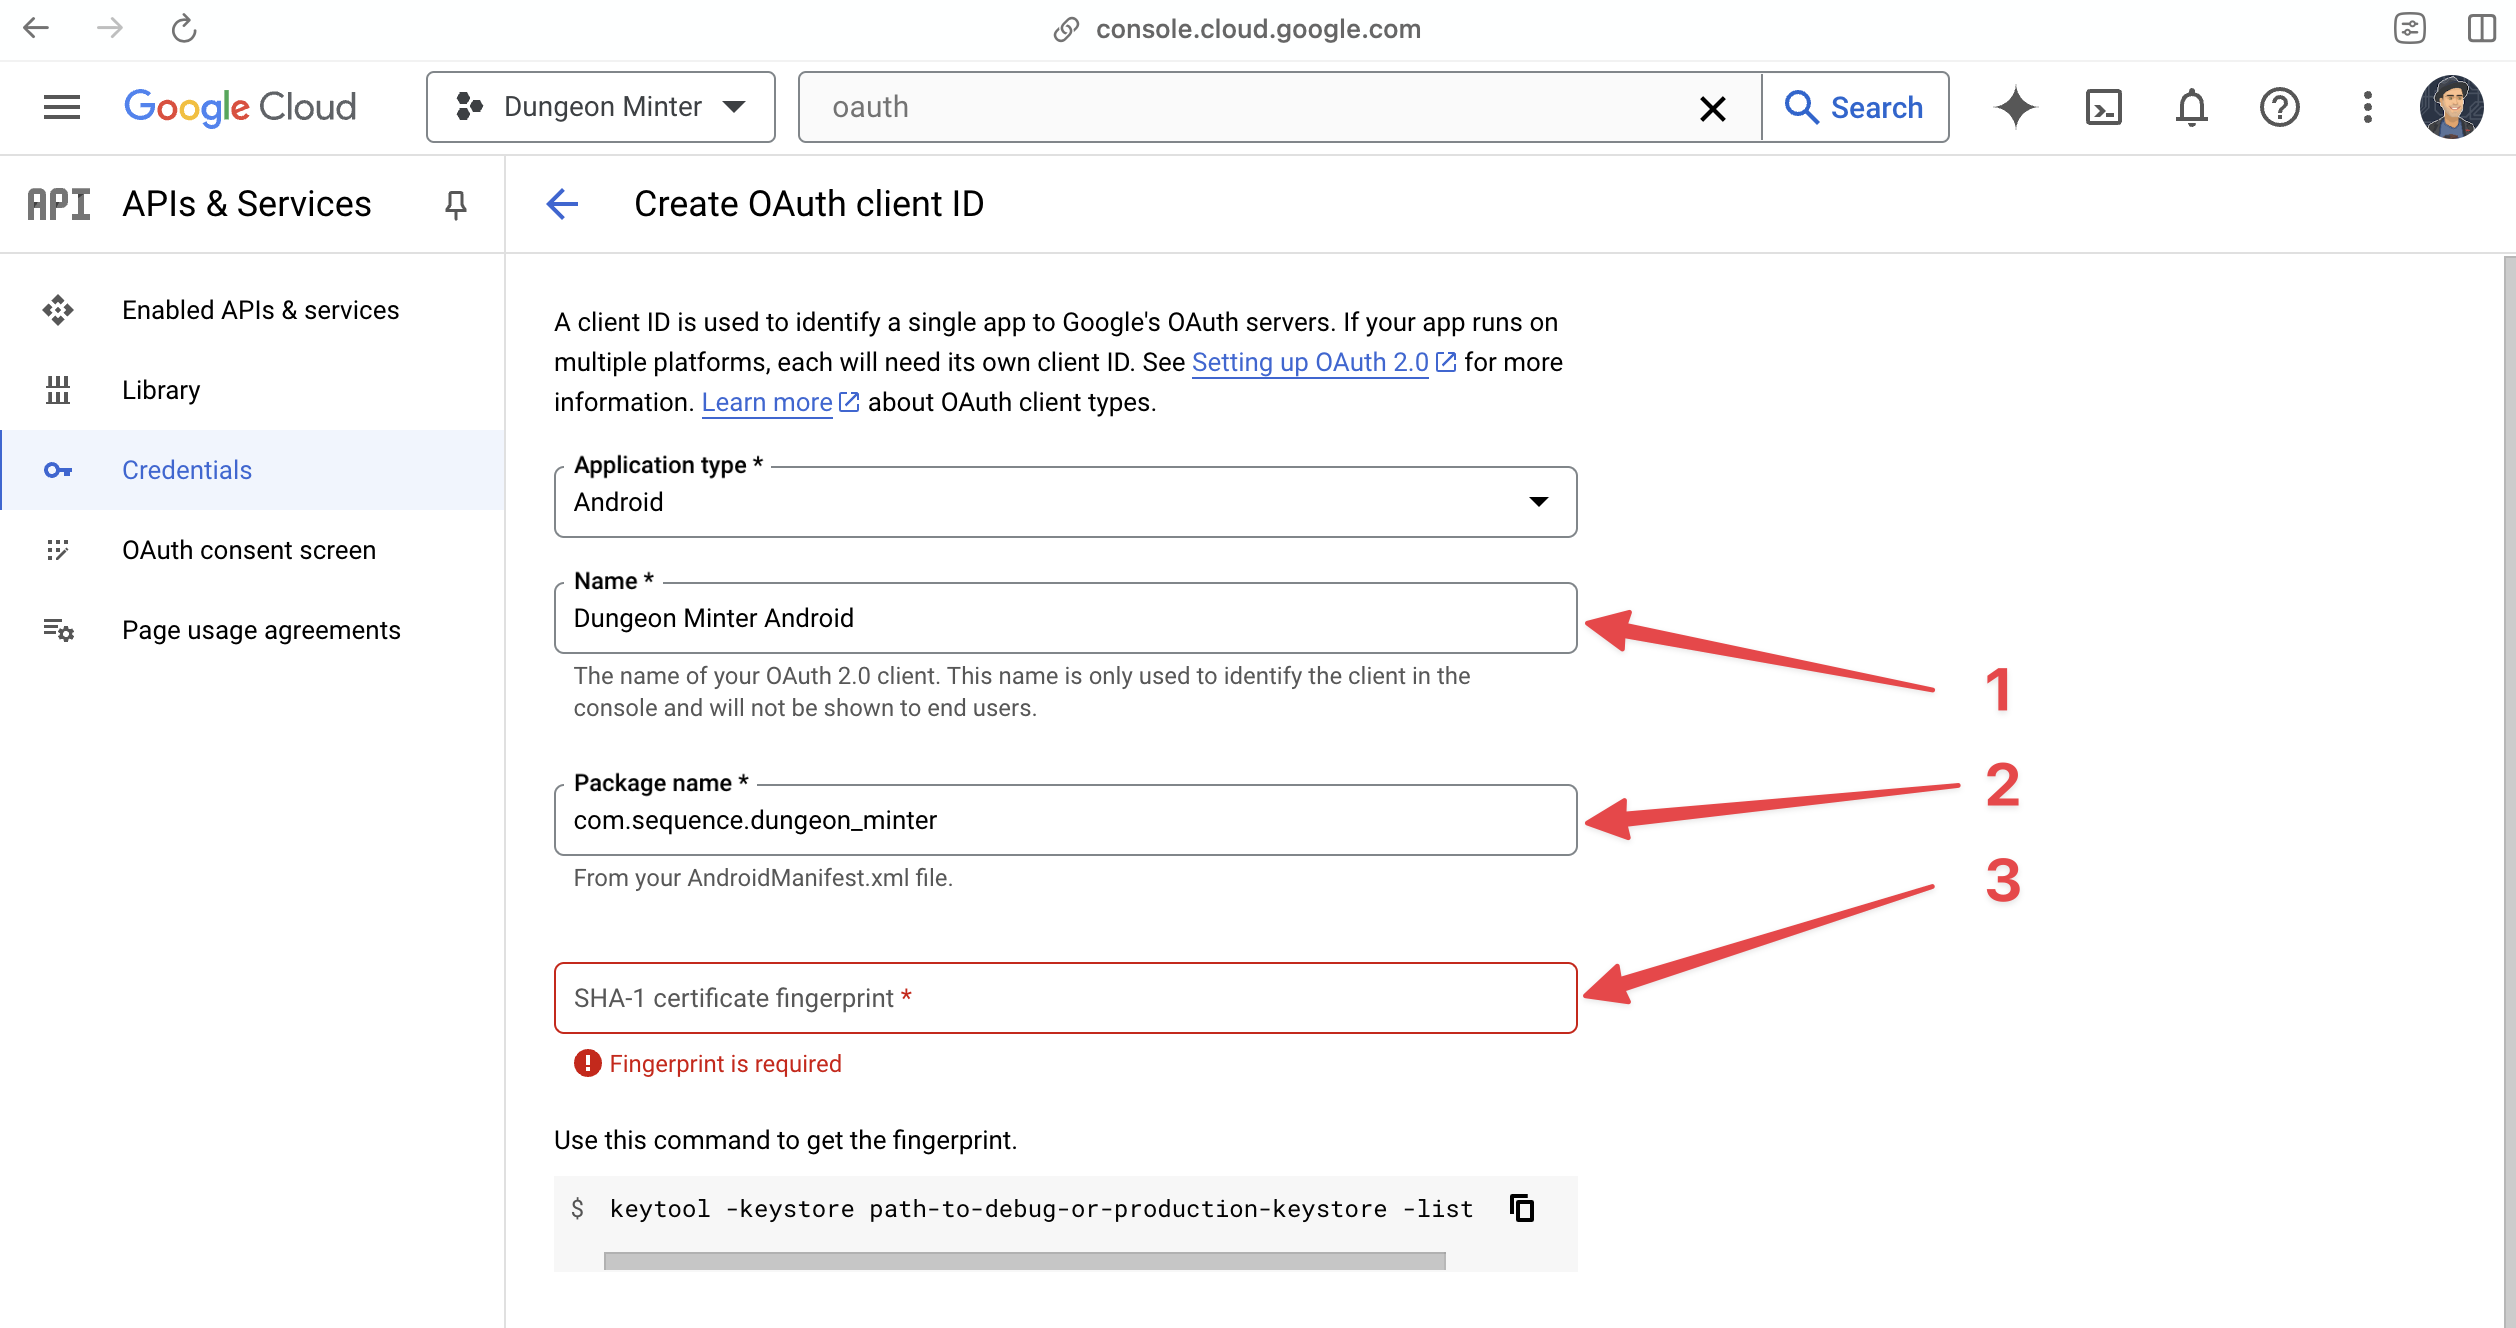
Androidアプリケーション用にクライアントIDを設定する場合、以下の情報が必要です:
1. アプリケーション名
2. パッケージ名:これはAndroidプロジェクトの一意のアプリケーションパッケージ名です。
3. SHA-1証明書フィンガープリント:これはアプリケーションバンドルのSHA-1フィンガープリントです。画面の指示に従い、`keytool`を使って生成できます。
ポート付きのlocalhostアドレス(例:`localhost:4444`)を承認済みオリジンに追加する場合、テスト時に動作させるためにはポートなしの`localhost`も追加する必要があります。
## Androidアプリケーションの設定
Androidアプリケーション用にクライアントIDを設定する場合、以下の情報が必要です:
1. アプリケーション名
2. パッケージ名:これはAndroidプロジェクトの一意のアプリケーションパッケージ名です。
3. SHA-1証明書フィンガープリント:これはアプリケーションバンドルのSHA-1フィンガープリントです。画面の指示に従い、`keytool`を使って生成できます。
 ## iOSアプリケーションの設定
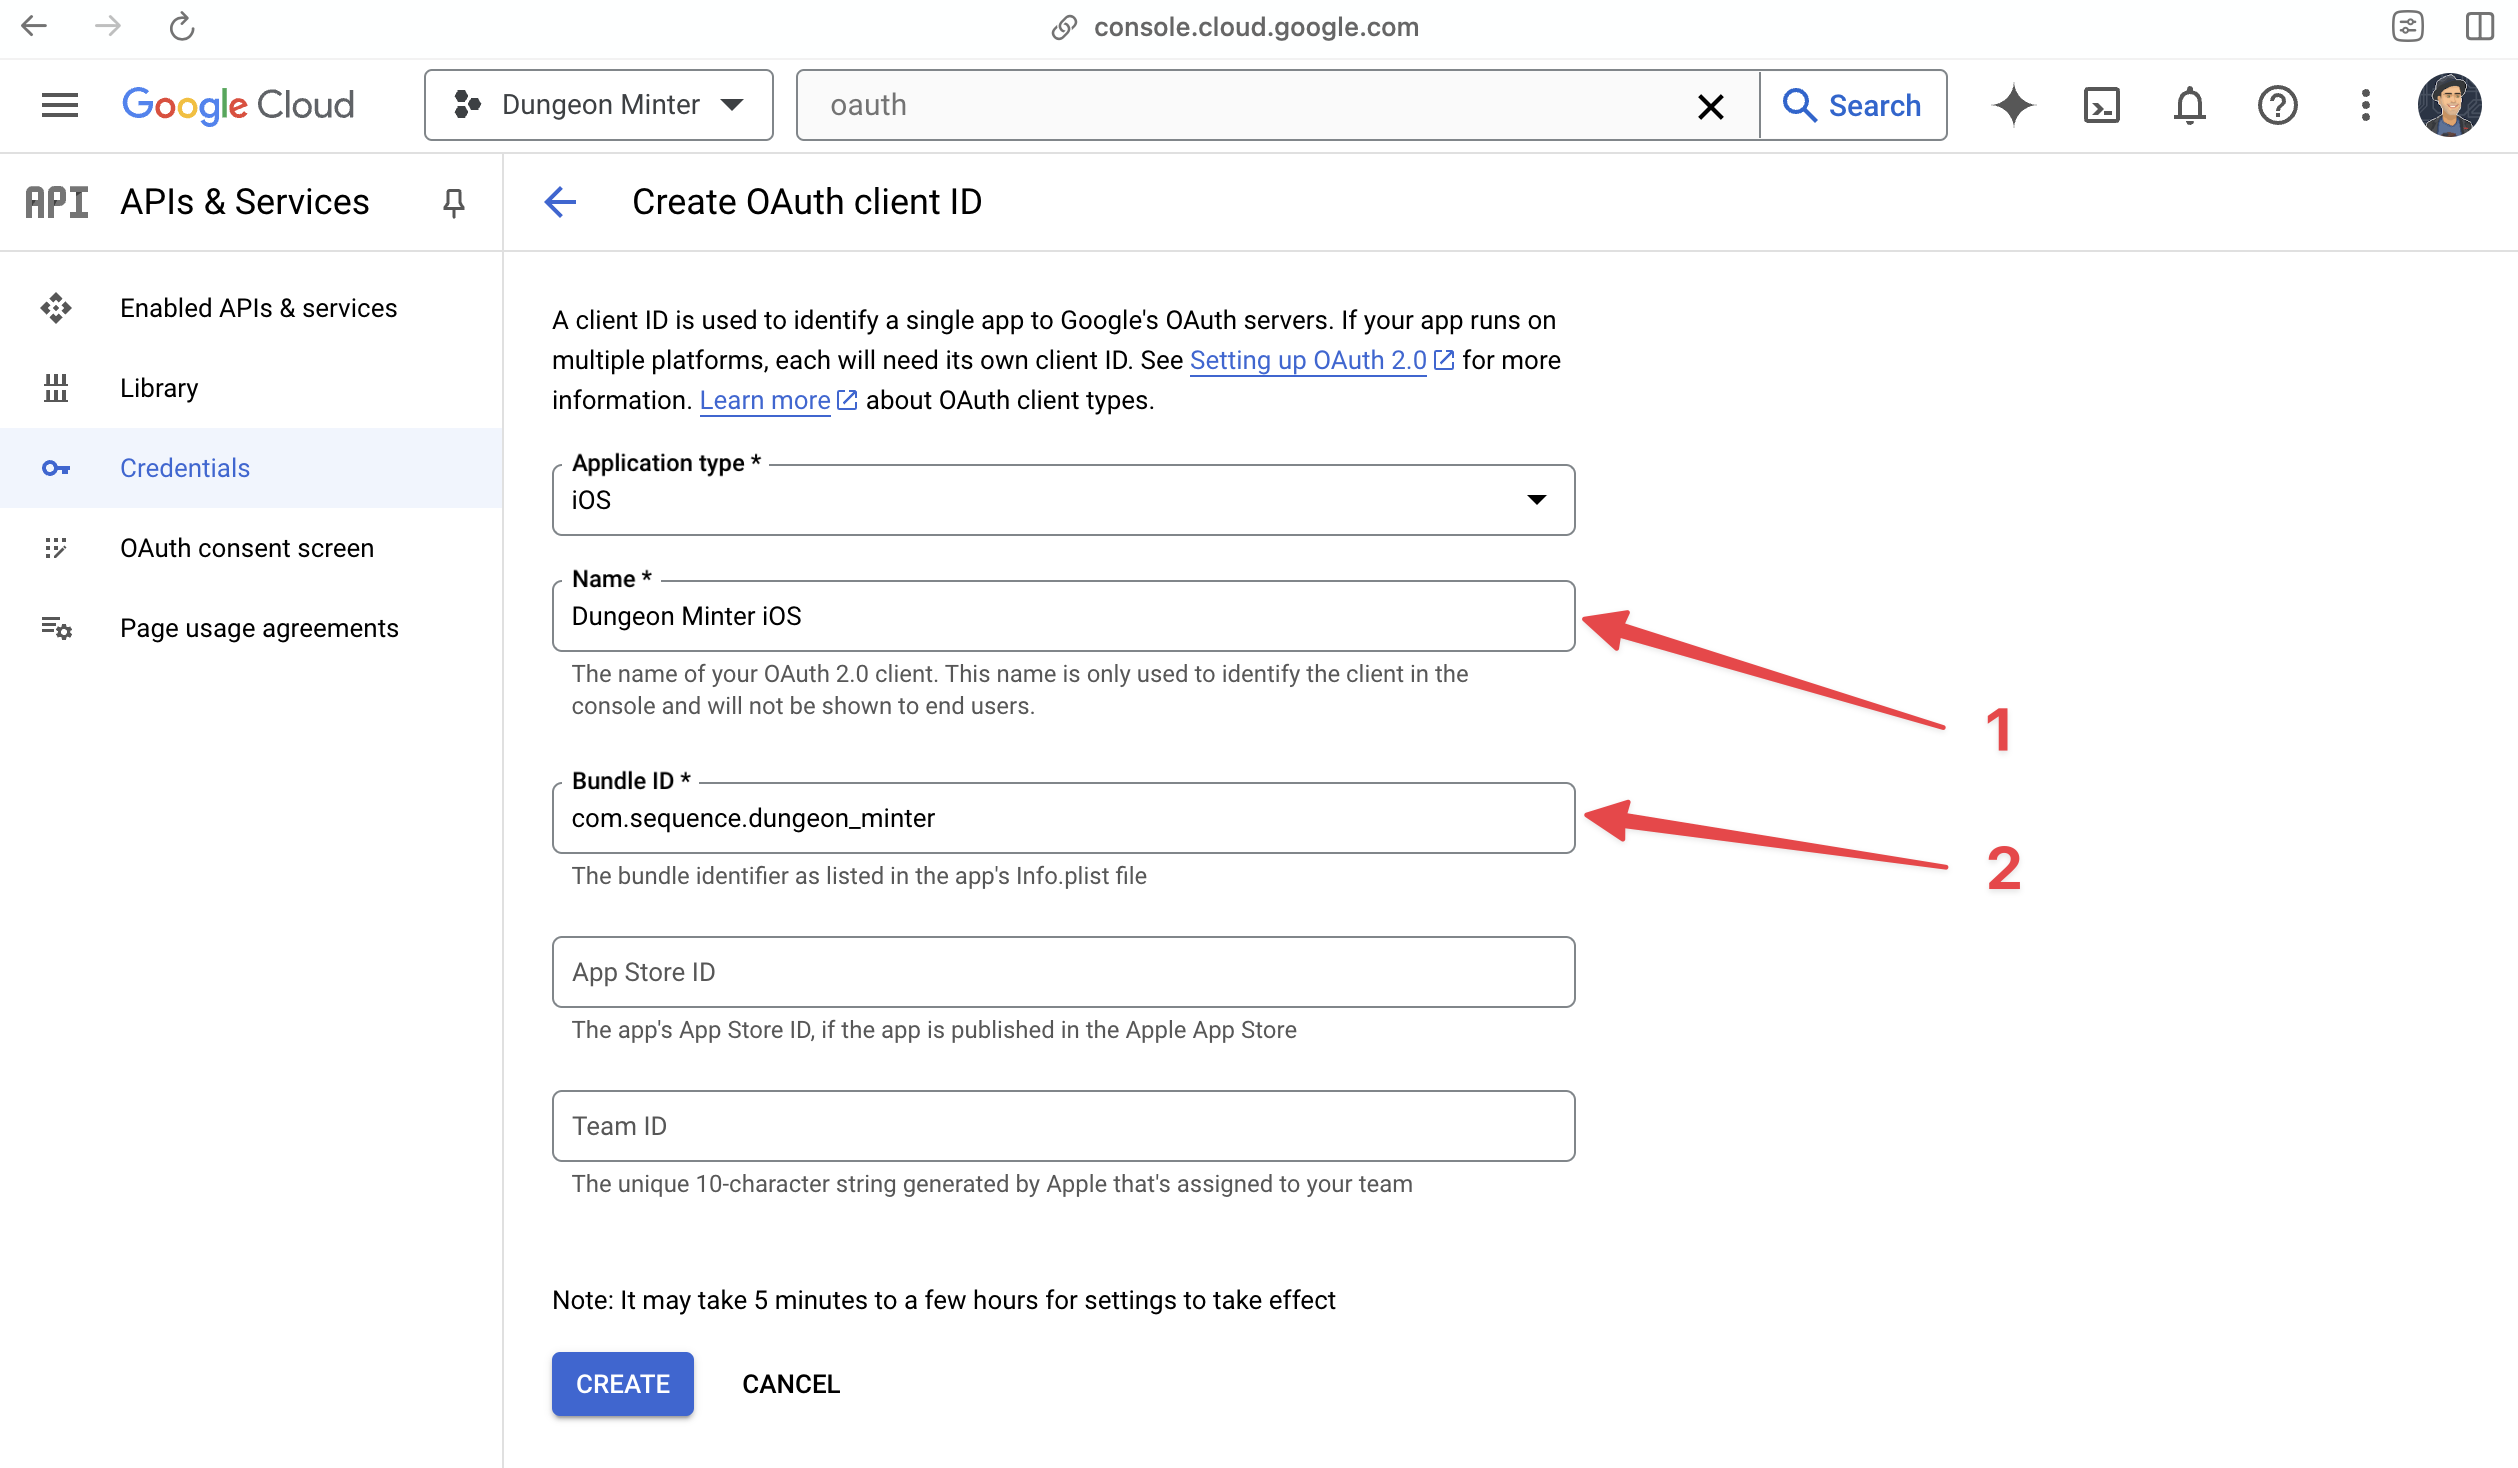
iOSアプリケーション用にクライアントIDを設定する場合、以下の情報が必要です:
1. アプリケーション名
2. バンドルID:これはiOSプロジェクトの一意のバンドル識別子です。
## iOSアプリケーションの設定
iOSアプリケーション用にクライアントIDを設定する場合、以下の情報が必要です:
1. アプリケーション名
2. バンドルID:これはiOSプロジェクトの一意のバンドル識別子です。
 ## クライアントIDの取得
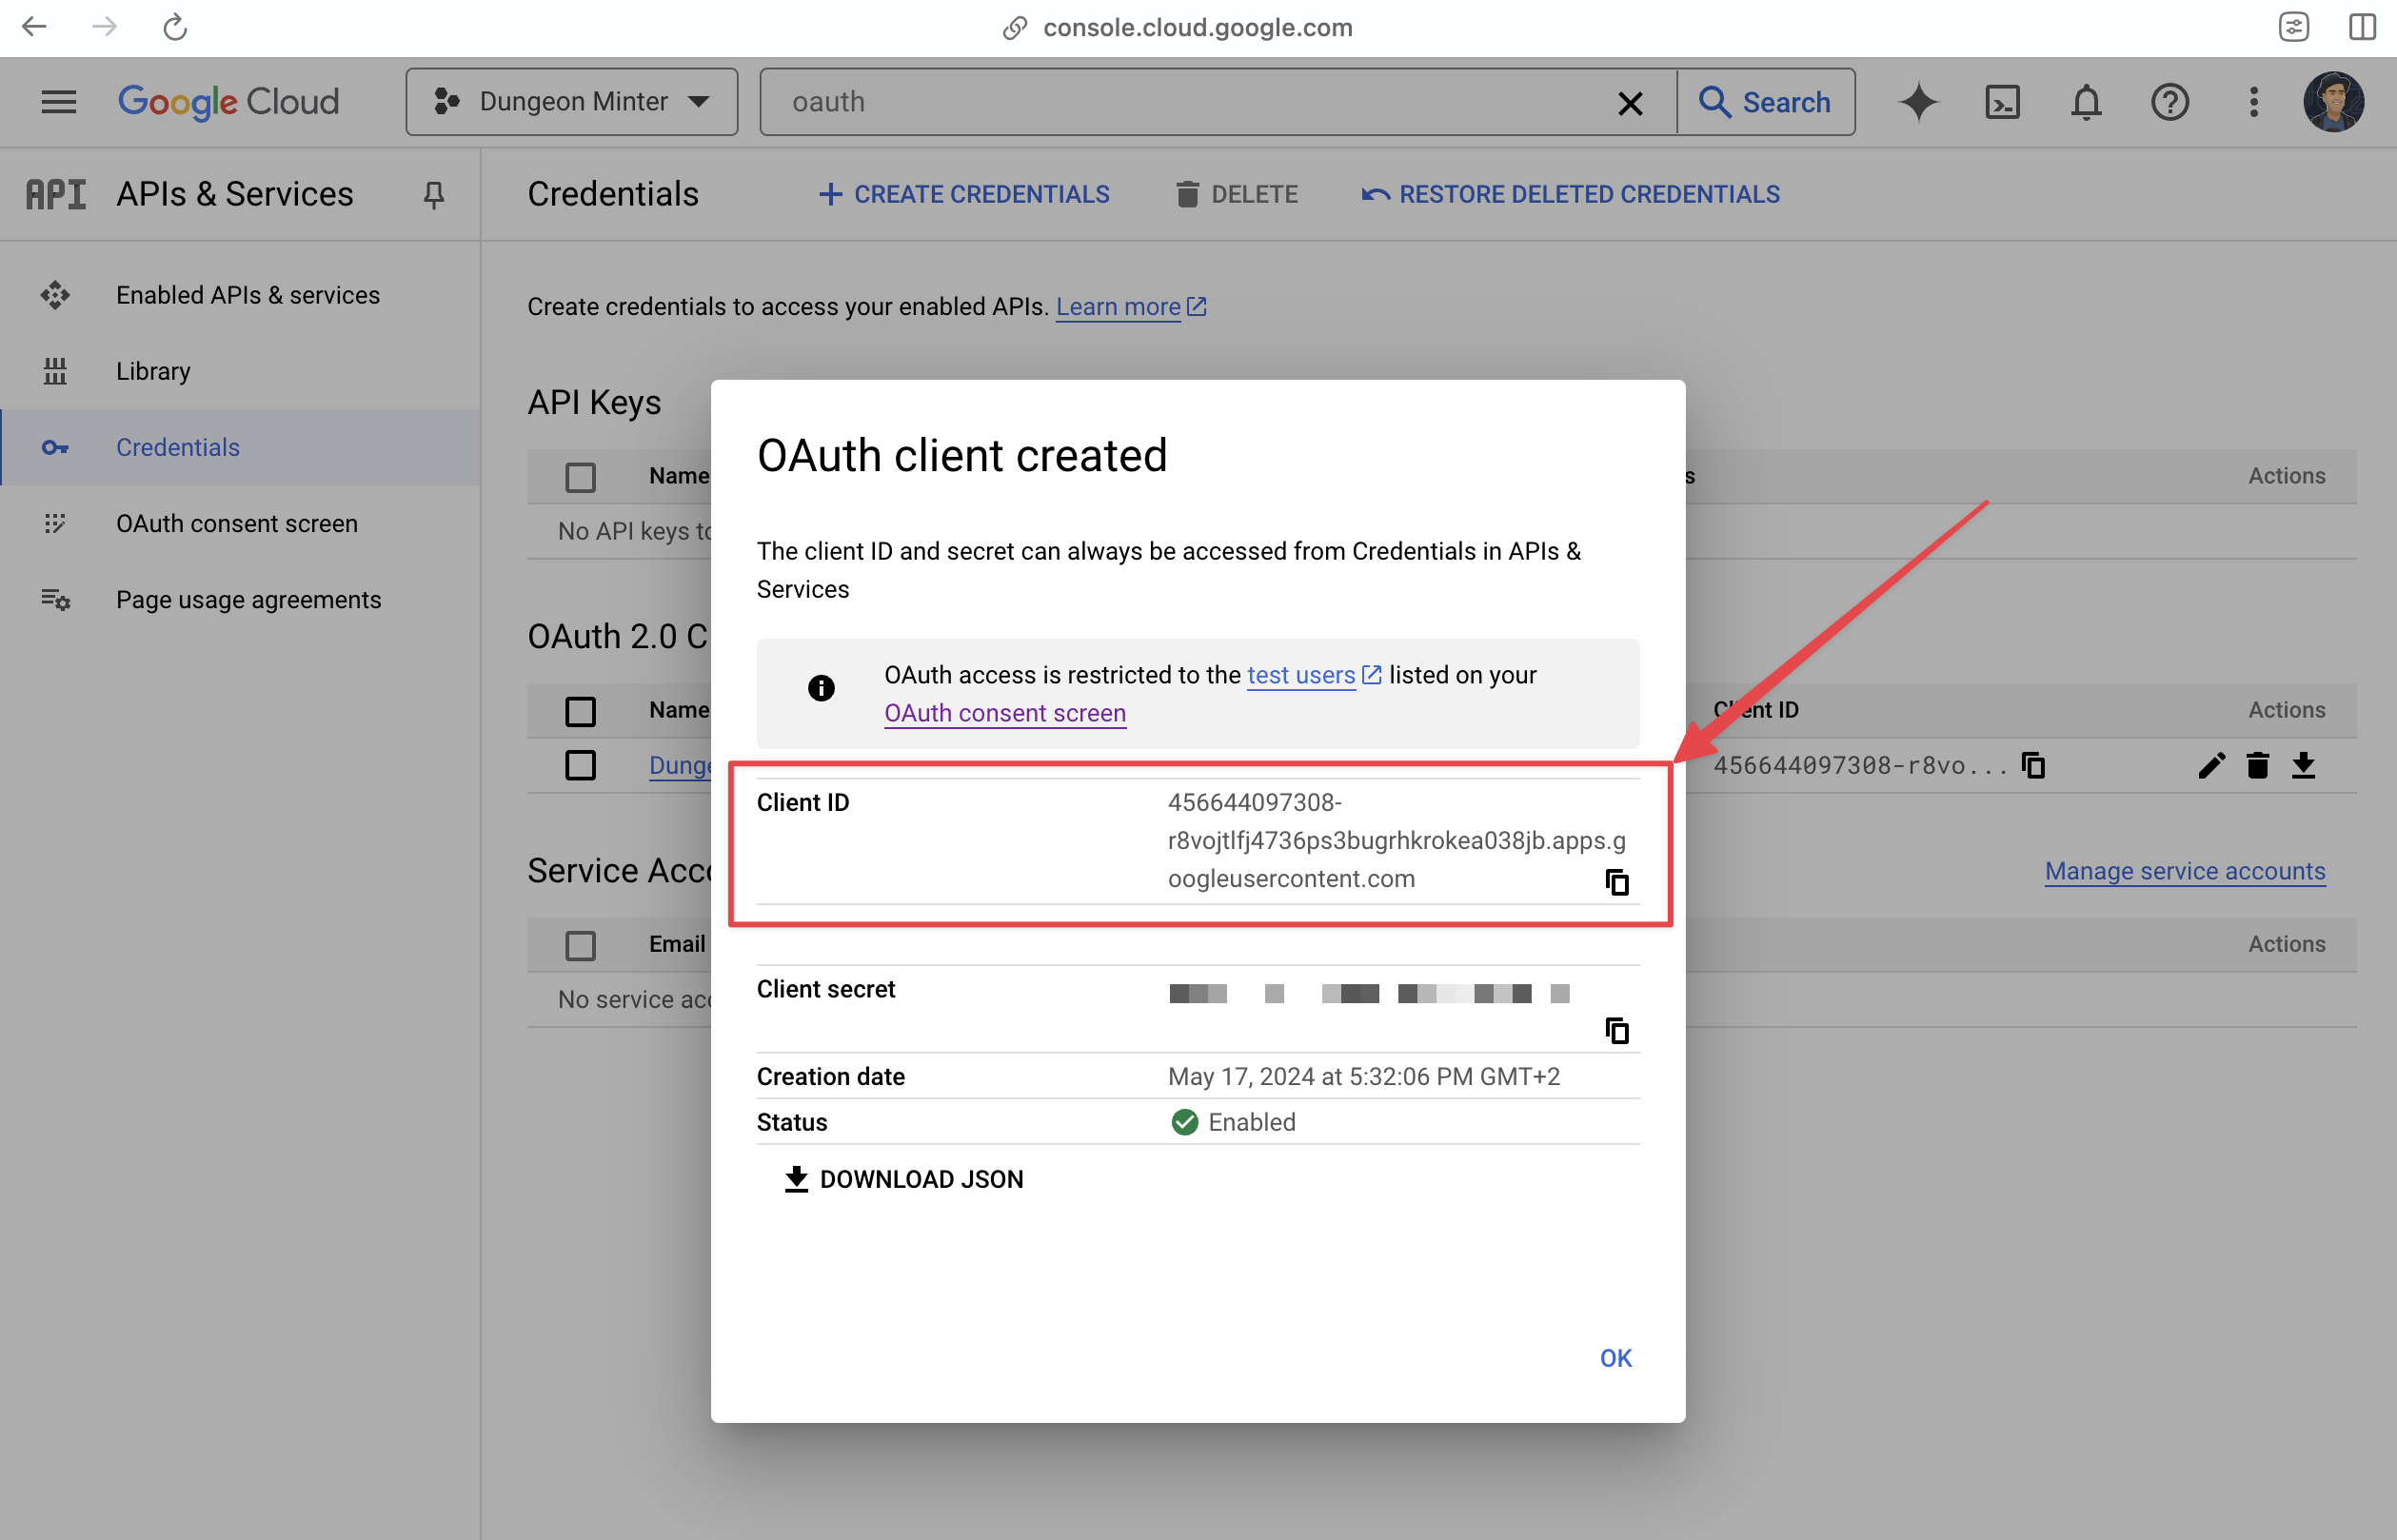
アプリケーションを作成すると、クライアントIDが表示されます。コピーして、Sequence BuilderのログインプロバイダーのクライアントIDとして使用してください。
## クライアントIDの取得
アプリケーションを作成すると、クライアントIDが表示されます。コピーして、Sequence BuilderのログインプロバイダーのクライアントIDとして使用してください。